Steps to Import data into InfoSewer Using GIS Gateway
Here are the steps from the beginning for importing data into InfoSewer:
Make a new InfoSewer Model and add in the layers you want to import 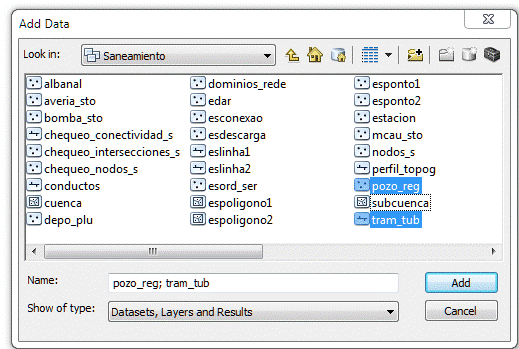 |
Initialize the InfoSewer Arc Map to the Coordinates of the Layers you have added 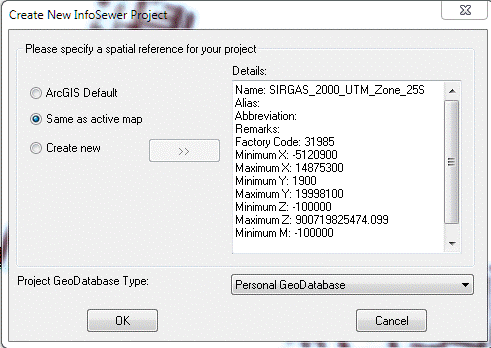 |
Look at the Attributes of the of the Layers in Arc Map by using the command Open Attribute Table in Arc GIS – right mouse click on the Arc Map Table of Contents (TOC) 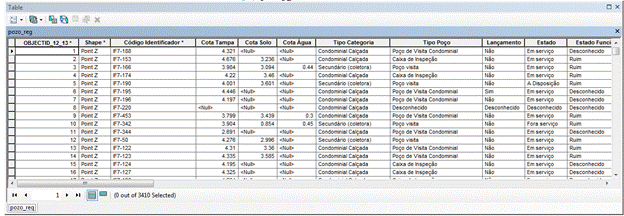 |
Turn off the Alias names as InfoSewer GIS Gateway only read the “real” column names 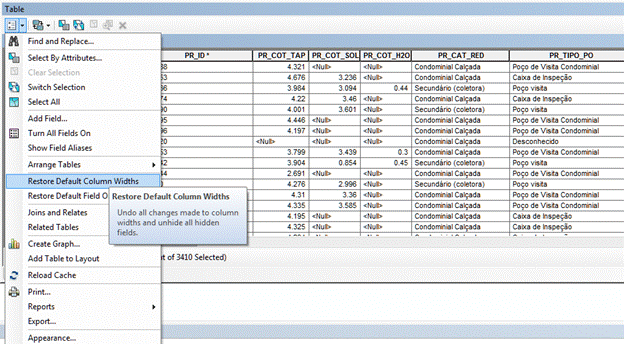 |
Use the InfoSewer GIS Gateway Tool  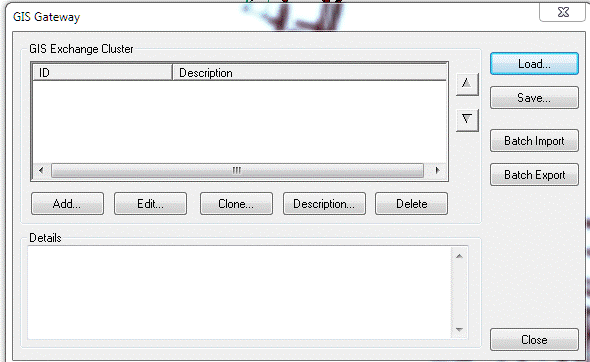 |
Load the Nodes 1st using the PR_ID as the Mapping Field 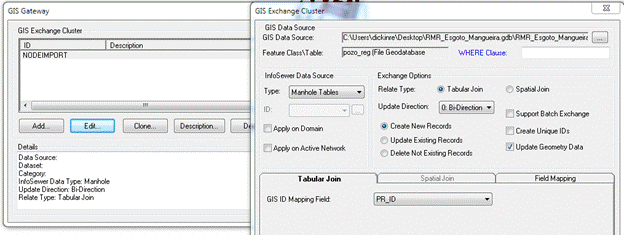 |
The map fields for the X, Y Coordinates 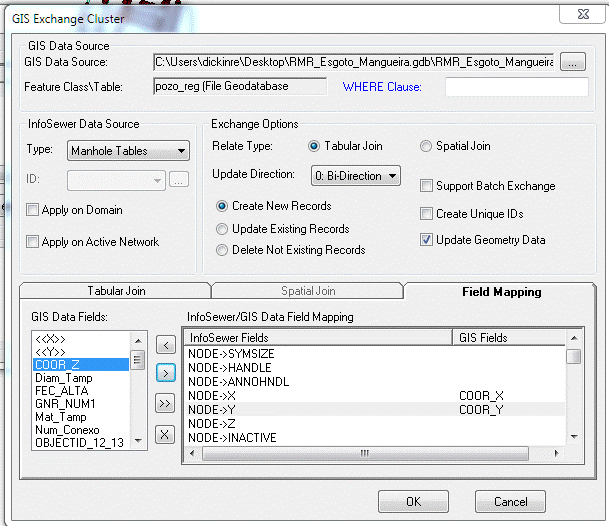 |
Import the Diameter (Diam_Tamp) and Rim Elevation (PR_COT_TAP) for the Node 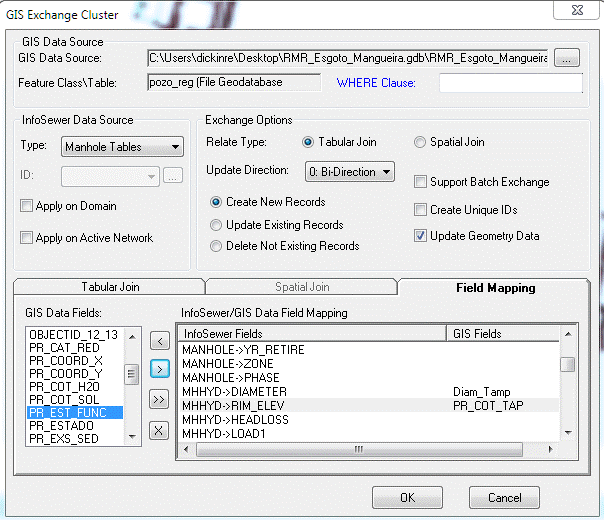 |
Load the defined GIS Gateway Layer 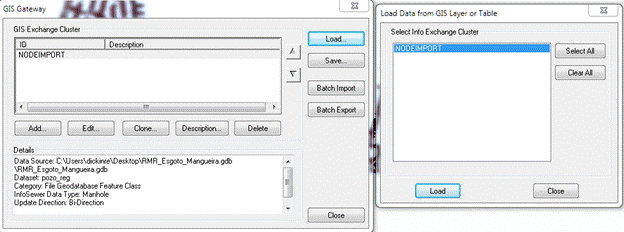 |
If the nodes were imported there should be a log message file and the nodes will be seen on the Map and in the InfoSewer Attribute Table Exchanging data on 'NODEIMPORT'... 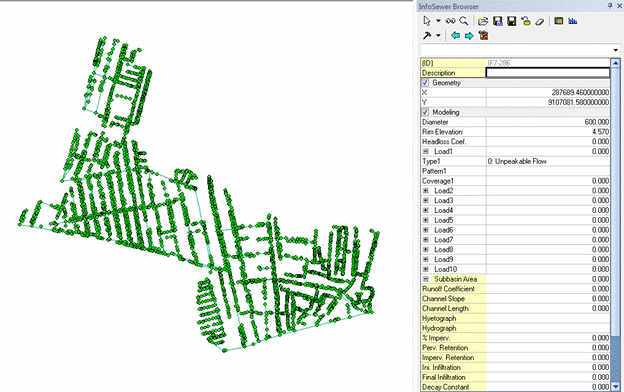 |
Turn off the Field Aliases for the Links so we can see the actual column names 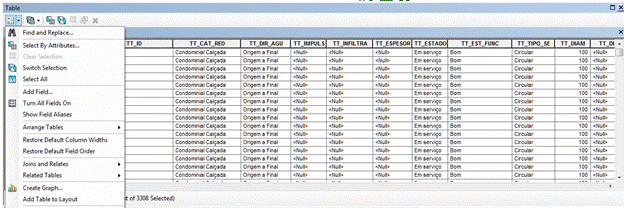 |
Use TT_ID as the GIS ID Mapping Field 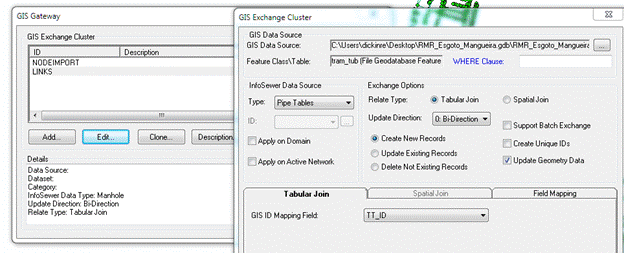 |
a. Gis Data Source: C:\Users\ … \tram_tub b. InfoSewer Data Source Type: Pipe Tables c. Relate Type: Tabular Join d. Update Direction: 0:Bi-Direction e. Exchange Options: Create New Records f. Tabular Join – GIS ID Mapping Field: TT_ID g. Field Mapping: i. PIPE->TYPE : TT_TIPO_SE ii. PIPE->MATERIAL : TT_MATERIA iii. PIPEHYD->LENGTH : TT_LONG iv. PIPEHYD->DIAMETER: TT_DIAM 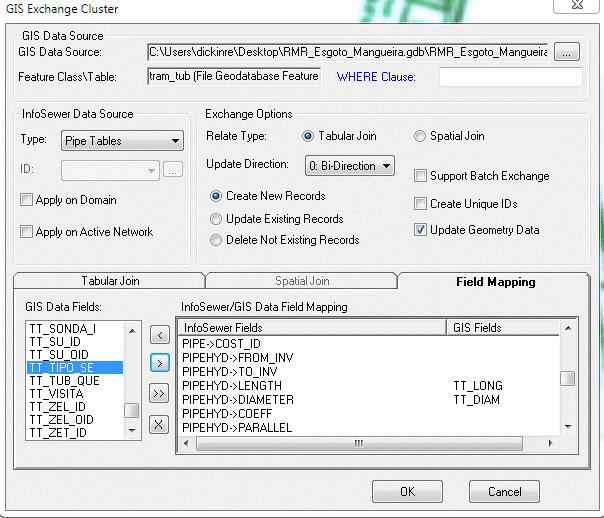 |
Load the Links from the GIS Gateway and you should have your links on the Map and in the Attribute Browser, I did not import the From and To Nodes and the From and To Invert as I was not certain of the Attribute Tables.  |

Comments
Post a Comment